Ants on the Unacloud cluster using SGE
Background
We got the challenge to generate an ANTSs template from 211 participants. We had run ANTss in the past in a machine containing 32 cores and with 40 images the process took about 8 days. We approximated that in order to calculate this template in the same machine it would take about a month of processing time. We would have to keep this machine dedicated full time to this task and this was not possible as this machine is usually moved around the lab for different projects. Therefore we decided to try to run Ants in a cluster environment.
Our university has a cluster platform called unacloud. It uses the computers in several computer rooms by running virtual machines in the background. These virtual machines are copied from an existing image but changing its name and ip address. We decided to use SGE for scheduling and queuing as it is natively supported by ANTs. There are several tutorials around the web about installing and using SGE, but here we will summarize the process that worked for us. For more information look at the bibliography of this post.
We divide the process in the following steps:
- A nfs shared file system, in order to share data and sge configuration
- A bind dns server, because sge relies a lot on host names
- SGE
- ANTSs
- Deployment in unacloud
Test environment
In this example we will use a Fedora server, and Debian clients. The master server will be called cangurosge, and the execution clients will be called canguros1, canguros2, canguros3 ... . We will assume all of them are inside a private network with prefix 10.0.2.
In all machines we have a user named canguro. The /etc/hosts file contains a line indicating the address of the master, for example
#/etc/hosts
127.0.0.1        localhost
10.0.2.5         cangurosge
In order to avoid problems, and because we assume we are in a trusted private network, we are going to turn off the firewall and selinux in the master. Notice in case you want to deploy this in a public netwowrk you should probably configure these services correctly
sudo systemctl stop firewalld
sudo systemctl disable firewalld
echo 0 > /sys/fs/selinux/enforce
#/etc/selinux/config
SELINUX=permissive
We will configure the master server and an image for a generic client. This image will then be instantiated on each of the hosts.
NFS
Server
First of all we need to create a folder, for example /home/canguro/nfs and add it to the exports file. The exports file should look like this
#/etc/exports
/home/canguro/nfs 10.0.2.1/24(rw,sync,no_all_squash,no_root_squash)
/usr/share/gridengine/default 10.0.2.1/24(rw,sync,no_all_squash,no_root_squash)
The second line is the folder where SGE configuration will be stored. Afterwards we need to start and enable the necessary services.
sudo systemctl enable rpcbind
sudo systemctl enable nfs-server
sudo service rpcbind start
sudo service nfs-server start
You can find more information about setting up the nfs server at the fedoraproject wiki.
Client
In order to connect to the server from the client we need to install the package nfs-common
apt-get install nfs-common
Afterwards we create the directory /home/canguro/nfs and mount the remote file system in it by typing
mount -t nfs cangurosge:/home/canguro/nfs /home/canguro/nfs
You may test nfs by writing a test file in the master and looking at it in the client or the other way around. For more detailed information look for example at this guide.
DNS Server
SGE is very picky about hostnames and ip addresses therefore it is very convenient to have an internal dns server. Other options are using NIS or if your ips are static adding all the information to the /etc/hosts file .
Using our internal DNS we will create a local zone called canguro.zone. Our server will be accessible through cangurosge.canguro.zone and clients will be accessible through names like canguros123.canguro.zone.
Server
First we will install the bind packages by typing
sudo yum install bind bind-utils
Now we will create a key for our clients to update their addresses in the dns
dnssec-keygen -a HMAC-MD5 -b 512 -n USER canguro.zone.
This will generate two files with names that look like
Kcanguro.zone.+157+51007.key
Kcanguro.zone.+157+51007.private
We will place these files inside our nfs folder so that the clients can access them. Open the .private file and copy the long string after key. Insert this string in the /etc/named.conf file as shown below. We will also add some sections at the end which describe the configuration for our zone.
#/etc/named.conf
//
// named.conf
//
// Provided by Red Hat bind package to configure the ISC BIND named(8) DNS
// server as a caching only nameserver (as a localhost DNS resolver only).
//
// See /usr/share/doc/bind*/sample/ for example named configuration files.
//

options {
        // Listen on the client ip address
        listen-on port 53 { 127.0.0.1 ; 10.0.2.5; };
        listen-on-v6 port 53 { ::1; };
        directory       "/var/named";
        dump-file       "/var/named/data/cache_dump.db";
        statistics-file "/var/named/data/named_stats.txt";
        memstatistics-file "/var/named/data/named_mem_stats.txt";
        // Allow queries only from our private network
        allow-query     { localhost; 10.0.2.1/24; };

        /*
        Comment stripped for brevity
        */

        recursion no;

        dnssec-enable yes;
        dnssec-validation yes;
        dnssec-lookaside auto;

        /* Path to ISC DLV key */
        bindkeys-file "/etc/named.iscdlv.key";

        managed-keys-directory "/var/named/dynamic";

        pid-file "/run/named/named.pid";
        session-keyfile "/run/named/session.key";
};

logging {
        channel default_debug {
                file "data/named.run";
                severity dynamic;
        };
};

zone "." IN {
        type hint;
        file "named.ca";
};

key canguro.zone.{
        algorithm "HMAC-MD5";
        // Copy it from the private key file
        secret "";
};

zone "canguro.zone" IN {
        type master;
        file "slaves/canguro.zone";
        allow-update {
                key canguro.zone;
                        };
        notify no;
};

// Inverted ip address from our private network
zone "2.0.10.in-addr.arpa." IN {
        type master;
        file "slaves/canguro.rr.zone";
        allow-update {
                key canguro.zone;
                        };
        notify no;
};

include "/etc/named.rfc1912.zones";
include "/etc/named.root.key";
Pay attention to the allow-query field, and the key block. The zone "canguro.zone" block is where we define forward dns, and is further specified in the file slaves/canguro.zone; which we will create afterwards. The zone "2.0.10.in-addr.arpa." block is for reverse dns lookup. This block is tricky and you need to pay special attention to the fact that ip addresses are inverted. For example 10.20.30.40 will look like 40.30.20.10. Now lets look at the zone files
#/var/named/slaves/canguro.zone
$ORIGIN .
$TTL 7200       ; 2 hours
canguro.zone            IN SOA  ns0.canguro.zone. hostmaster.canguro.zone. (
                                2000640    ; serial
                                28800      ; refresh (8 hours)
                                1800       ; retry (30 minutes)
                                604800     ; expire (1 week)
                                86400      ; minimum (1 day)
                                )
                        NS      ns0.canguro.zone.
$ORIGIN canguro.zone.
$TTL 14000      ; 3 hours 53 minutes 20 seconds
ns0                     A       10.0.2.5
#/var/named/slaves/canguro.rr.zone
$ORIGIN .
$TTL 7200       ; 2 hours
2.0.10.in-addr.arpa IN SOA ns0.canguro.zone. hostmaster.canguro.zone. (
                                2000027    ; serial
                                28800      ; refresh (8 hours)
                                1800       ; retry (30 minutes)
                                604800     ; expire (1 week)
                                86400      ; minimum (1 day)
                                )
                        NS      ns0.canguro.zone.
                        PTR     ns0.canguro.zone.
$ORIGIN 2.0.10.in-addr.arpa.
Both of these files will get larger as clients begin to add their information. Finally we start the service
systemctl start named.service
systemctl enable named.service
If something fails, run systemctl status -l named to look for a more useful error message. Additional information about setting up bind can be found here.
Client
The easiest way to configure the client to query our private dns first, is changing the /etc/resolv.conf file. Notice that this file will be overwritten by the dhcp client. Because in unacloud we are not using dhcp we will not have this problem.
#/etc/resolv.conf
domain canguro.zone
search canguro.zone
nameserver 10.0.2.5
nameserver 8.8.8.8
The first two lines let us do ping cangurosge instead of ping cangurosge.canguro.zone. The first nameserver is our own, but this server only resolves names inside canguro.zone. We use a second nameserver so that we can resolve standard domain names. More information about setting up the network in debian can be found here.
Finally we need to register the clients with the nameserver. For that we need to cd into the directory containing the keys and use the nsupdate application. We use the following scrpit to automate this process
#update_dns.sh

#!/bin/bash
cd /home/canguro/nfs/keys
MYIP=$(hostname -I)
REVERSIP=$(echo $MYIP |awk -F"." '{for(i=NF;i>0;i--) printf i!=1?$i".":"%s",$i}')
MYNAME=$(hostname)
nsupdate -k Kcanguro.zone.+157+51007.private << EOF
server 10.0.2.5
update delete $MYNAME.canguro.zone A
update add $MYNAME.canguro.zone 14000 A $MYIP
send
update add $REVERSIP.in-addr.arpa 14000 PTR $MYNAME.canguro.zone
send
EOF
Grid Engine
Grid Engine is a very complex piece of software. It includes several advanced features like accounting, reservations, quotas and interactive jobs. Fortunately for running ants we only need some basic functionality.
Server
We start by installing the sge packages
sudo yum install gridengine gridengine-qmaster gridengine-execd gridengine-qmon gridengine-devel
This will download the necessary files and create the required users and groups. To complete the installation
cd /usr/share/gridengine
./inst_sge -m
# accept defaults with the following exceptions:
# say NO to verify permissions
# choose CLASSIC SPOOLING, not Berkeley db
# you may leave the execution hosts list empty for now
# no shadow host
Several documents (1,2,3) advise against using berkeley db unless the cluster is very large.
To test the installation try running sge_qmaster. By default this command launches a daemon, so it should return almost immediately. You can check if it worked through ps -A | grep sge. If it fails, use the following procedure to get a better idea of what the problem is:
source  /usr/share/gridengine/util/dl.sh
# adds the dl command to your environment
dl 10
#sets debug level to 10, and turns off daemon mode
sge_execd
In my case the sevice file had a wrong location for the PIDFile and so it was not possible to launch the qmaster through systemd. It is ok to run it from the command line, but if you want to use systemd here is the corrected file:
# /usr/lib/systemd/system/sgemaster.service

[Unit]
Description=Gridengine master daemon and scheduler
After=network-online.target

[Service]
Type=forking
EnvironmentFile=-/etc/sysconfig/gridengine
ExecStart=/usr/bin/sge_qmaster
# If running under a different cell, copy this file to /etc/systemd/system/sgemaster.service
# and change default below to the cell name
PIDFile=/var/spool/gridengine/default/spool/qmaster/qmaster.pid

[Install]
WantedBy=multi-user.target
Now you can do
systemctl start sgemaster
systemctl enable sgemaster
Add the directory /usr/share/gridengine/default to the nfs exports list so that the clients can get the configuration.
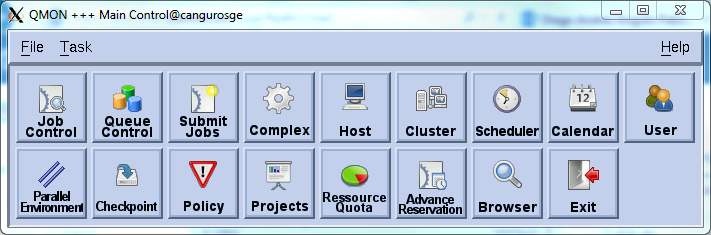
To test that everything works, launch the qmon interface. It looks outdated but does the job. You should get the following screen(requires an X session). If you prefer it is also possible to configure and check the status of gridengine from the command line using commands like qstat and qconf.
Two final tasks to finish configuration of the server.
Create a hostgroup: click on the "Host" button in qmon, go to the Host Groups Tab and click add. in the top field write @allhosts and click ok. (For the moment there will not be any members)

Create a Queue: click on the "Queue Control" button in qmon. In the "Cluster Queues" tab click "Add", write a name for the queue and on the New Host/Hostgroup field write "@allhosts" and cilck on the arrow. You can use the bottom panel to further customize the queue. An important field is "slots", which is the number of jobs that will be run simultaneously on each host.

Client
The first step is also to install the debian packages:
apt-get install gridengine-client gridengine-exec
Remember that the name of the master is cangurosge and the cell is named default (from the inst_sge script). You will likely get an error about not finding the qmaster, but this is ok for now. There are two additional steps in the configuration
Mount the shared "cell" directory
mount -t nfs cangurosge:/usr/share/gridengine/default /usr/share/gridengine/default
# to keep logs in a common directory
ln -s /usr/share/gridengine/default /usr/share/gridengine/default
Register as an administrative host, and add to the @allhosts group
SLAVE_NAME = $(hostname)
ssh cangurosge "qconf -ah $SLAVE_NAME"
ssh cangurosge "qconf -aattr hostgroup hostlist $SLAVE_NAME @allhosts"
We are ready to run sge_execd. This is also a daemon, if there are still problems use ld.sh as above. Note that this file is not included in the debian package, but you may copy it from the master.
If everything works you should be able to see the slave in the "Queue Instances" tab of the "Queue Control" panel in Qmon (in the master). You can test by creating a single job which writes the hostname to a file, for example
#test_job.sh
sleep 60
date >> /home/canguro/nfs/test_job_out.txt
hostname >> /home/canguro/nfs/test_job_out.txt
Then submit this job to the cluster by typing qsub test_job.sh in the master.
Installing ANTs
The recomended way to install ants is by compiling it from source. This has to be done separately in the server and the client. The source and instructions for compiling can be found in their github repository. After compiling copy all the binaries and scripts to a directory called ants_bin outside the _nfs. This directory should be the same in both master and slave, for example /home/canguro/ants_bin.
Deploying in Unacloud
Server
The server is instantiated in a dedicated machine. The only required step is to configure the clients' ip range:
- Add the ip ranges to the nfs exports file
- Add the ip ranges to the named.conf allow-query field
- Create a .zone file and named.conf section for reverse ip lookup in this range
Clients
If the master ip changed when deploying remember to update it in:
- /etc/hosts
- /etc/resolv.conf
- All the scripts in this section
In the clients we need to mount the shared file systems, register to the dns, and launch the sgeexecd daemon at startup, but only _after unacloud has finished configuring the network and assigning a name. For this purpose we can crate the following script inside /etc/init.d.
# /etc/init.d/setup_slave.sh

#!/bin/bash

#Wait for unacloud to work
sleep 10

## mount shared folders
mount -t nfs cangurosge:/home/canguro/nfs /home/canguro/nfs
mount -t nfs cangurosge:/usr/share/gridengine/default /usr/share/gridengine/default
sleep 5

## update my data in dns
cd /home/canguro/nfs/keys
MYIP=$(hostname -I)
REVERSIP=$(echo $MYIP |awk -F"." '{for(i=NF;i>0;i--) printf i!=1?$i".":"%s",$i}')
MYNAME=$(hostname)
nsupdate -k Kcanguro.zone.+157+51007.private << EOF
server 10.0.2.5
update delete $MYNAME.canguro.zone A
update add $MYNAME.canguro.zone 14000 A $MYIP
send
update add $REVERSIP.in-addr.arpa 14000 PTR $MYNAME.canguro.zone
send
EOF

sleep 20
## start sge_execd
sge_execd
Note that for the sge_qmaster to accept the client it is necessary to first add it to the @allhosts group and register it as an administrative host. The names in Unacloud start with a base name, and are followed by the last two octets of the ip without the dot, for example canguros202128 will have an ip that ends in 202.108 . It is convenient to use a script from an existent slave that registers all the possible slave names in the master. The master will check that the ip and hostname can be resolved consistently, so we need to trick it using the dns server. We can use the following script.
#register_slave2.sh

#!/bin/bash

register_dns() {
## update my data in dns
cd /home/canguro/nfs/keys
MYIP=$(hostname -I)
REVERSIP=$(echo $MYIP |awk -F"." '{for(i=NF;i>0;i--) printf i!=1?$i".":"%s",$i}')
MYNAME=$(hostname)
nsupdate -k Kcanguro.zone.+157+51007.private << EOF
server 10.0.2.5
update delete $MYNAME.canguro.zone A
update add $MYNAME.canguro.zone 14000 A $MYIP
send
update add $REVERSIP.in-addr.arpa 14000 PTR $MYNAME.canguro.zone
send
EOF
}

main() {
if [ $# -lt 1 ]; then
exit 1
fi
local SLAVE_NAME=$1
#set machine name
hostname $SLAVE_NAME
register_dns
echo "sleeping a while"
sleep 1
#register as administrative host
ssh cangurosge "qconf -ah $SLAVE_NAME"
#add to allhosts group
ssh cangurosge "qconf -aattr hostgroup hostlist $SLAVE_NAME @allhosts"
}

main $1
And for adding slaves 239[2 .. 255] we can input the following
for i in `seq 2 255`
do echo bash register_slave2.sh canguros239$i
bash register_slave2.sh canguros239$i
sleep 15
done
Loading the slave image into unacloud and deploying is carried out through a web interface which can be accessed at http://unacloud.uniandes.edu.co/Unacloud2/.
Running ANTs
Almost ready to create a template in the cluster.
Open the antsMultivariateTemplateConstruction2.sh script and look for a line that says QSUBOPTS="" # EDIT THIS and change it to
QSUBOPTS="-r yes" # EDIT THIS
Place all the images in a folder inside the nfs and run the following script
#run_ants.sh

#!/bin/bash
export PATH=/usr/local/bin:/usr/bin:/usr/local/sbin:/usr/sbin:/home/canguro/.local/bin:/home/canguro/bin:/home/canguro/ants_bin
ANTsPath=/home/canguro/ants_bin/
inputPath=${PWD}/


${ANTsPath}/antsMultivariateTemplateConstruction2.sh \
  -d 3 \
  -o ${inputPath}kmcT_ \
  -i 4 \
  -g 0.25 \
  -c 1 \
  -k 1 \
  -w 1 \
  -f 8x4x2x1 \
  -s 3x2x1x0 \
  -q 100x70x50x10 \
  -n 1 \
  -r 1 \
  -l 1 \
  -m CC[4] \
  -t SyN[0.1,3,0] \
  ${inputPath}/T1_[0-9]*.nii.gz
The key parameter is -c 1 , which tells ants to submit jobs using qsub. Run this script using screen or nohup, because it will take a long time and you will eventually want to disconnect from the server.
Monitoring progress
Let's assume you run the main ANTSs scripts like this
nohup "bash run_ants.sh > ants_output.txt"
You can now from any terminal type tail -f ants_output.txt to see how many jobs are pending and how many iterations are left. It is sometimes convenient to filter out the job numbers with
cat output.txt | grep -i "\(start\)\|\(wait\)" | less
For monitoring SGE the first option is qmon. By clicking the Queues control button you can see information about which clients are alive and how many jobs are they running. By clicking the Job Control button you can see information about the pending and running jobs. From this screen you can also reschedule jobs which are hanged. The qmon interface looks old and has several usability problems and sometimes is better to look at this information from the terminal. To see the list of running jobs use qstat, and to see the list of slaves use qstat -f.
To get the exit status from an already finished job we can use
qacct -j <job_id> | grep exit_status
Update
The first time we ran the process we got a very disappointed output. Aparently by default SGE does not re run failed jobs, and neither does ANTs. However ANTs will re run jobs if the exit status is 99. Therefore one option is adding | exit 99 at the end of every command in the $qscript files generated by antsMultivariateTemplateConstruction2.sh.
We however decided to reimplement the waitForSGEQJobs script in order to have a better control of failed jobs. Our version of the script reads the exit code of possibly finished jobs and re submits them if necessary.
We also found out that several machines were hanging due to problems with the NFS drive. In the final run we changed NFS for a shared SMB volume that was running on a separate machine on the university data center.
Another problem we encountered was a bug that causes N4BiasFieldCorrection to fail with float data types. The workaround is using double precission and removing -s 1 from the N4BiasFieldCorrection command.
Finally we found that using images with 0.5mmx0.5mmx0.5mm resolution required too much memory, this required singificant swapping and was causing our estimates of running time to be about a month. By resampling input data to 1mmx1mmx1mm we reduced significantly the memory requirements, and were therefor able to use two slots on each machine without swapping. Our estimate went down to a week of processing using 13 nodes.
In the final run we used 219 images and 40 nodes. The whole process took 103h 26m 11s.
Bibliography
- Unacloud
- Administration Guide Draft/NFS
- Basic NFS Configuration on Debian 7
- OpenShift Deployment Notes: Running a Local Dynamic DNS Service
- Debian NetworkConfiguration
- Deploying Sun Grid Engine on a Cluster
- Grid Engine 6 Troubleshooting
- Installation of Oracle SGE Engine Master Host on Red Hat
- Advanced Normalization Tools (ANTs)