Sample Overview
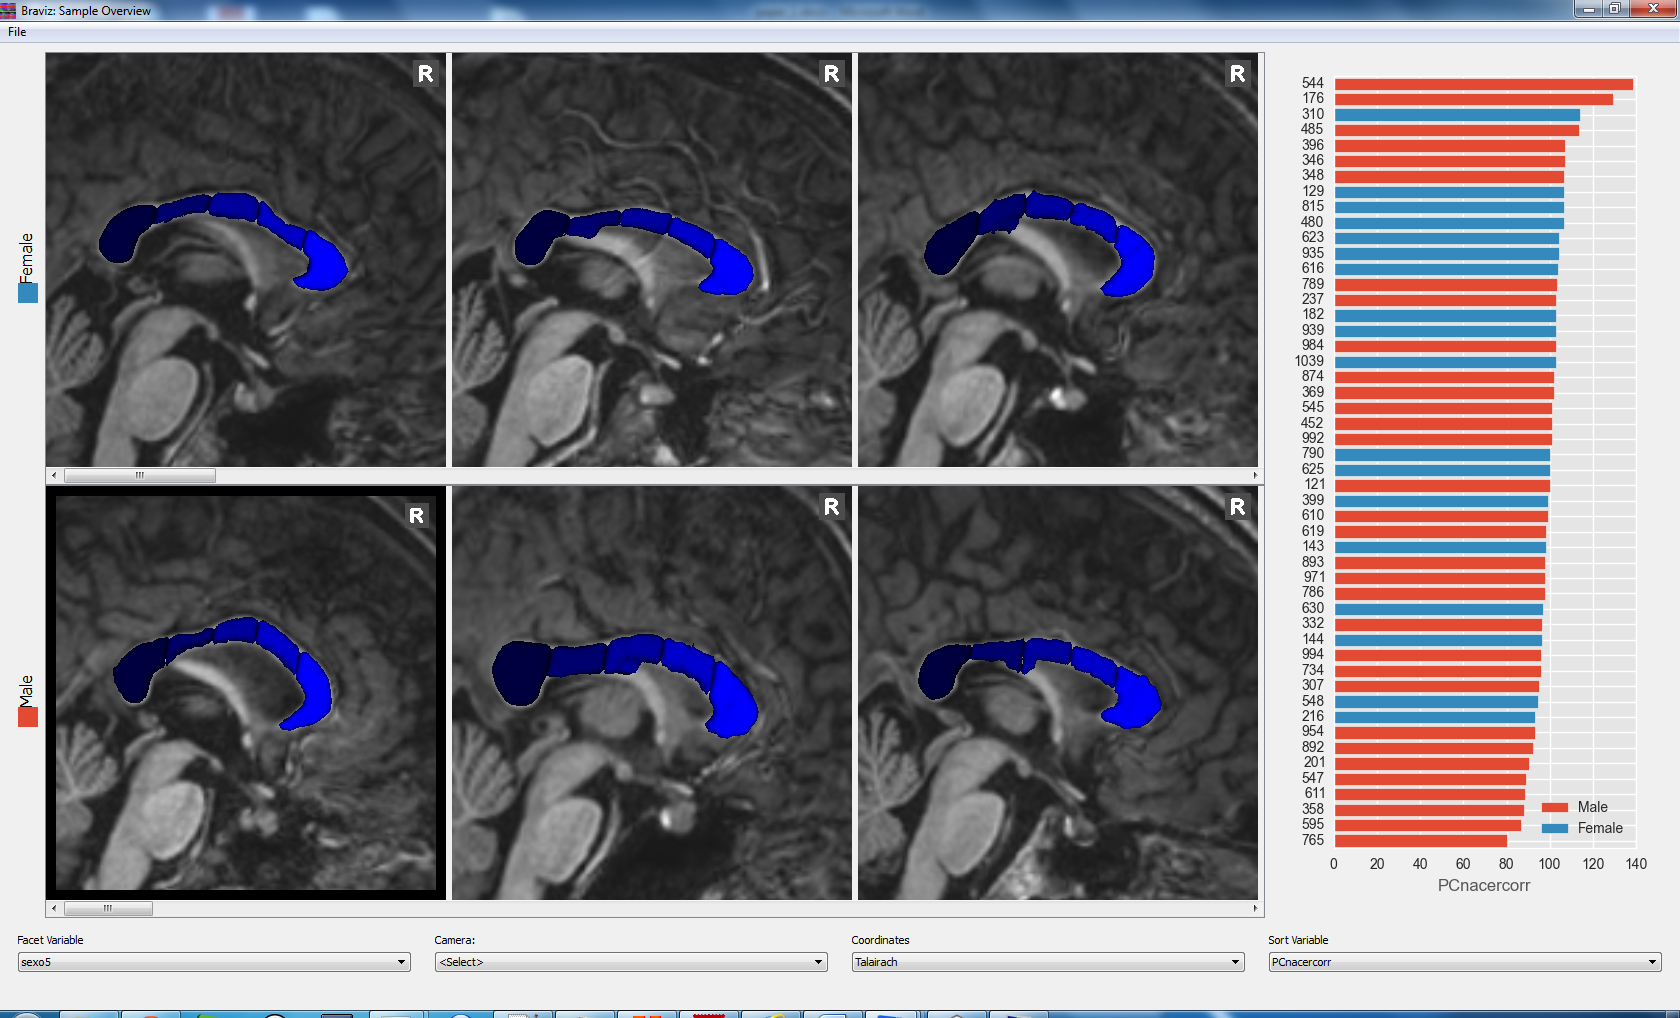
This application provides a small multiples view of the same scenario applied to several subjects. Subjects are arranged in rows that correspond to levels of a nominal variables, and inside each row subjects are ordered from left to right with respect to a real variable.
The right side displays a bar plot with the data from the two variables. Clicking on a bar will highlight (subtly) the corresponding 3d viewers, and the other way around.
Right clicking on a 3d viewer will display a context menu where you can choose between sending a message to other applications asking them to switch to the selected subject (show in current viewers); or opening a new subject overview application with the corresponding scenario at full scale (show in new viewer). Sometimes you may need to first click and then right click, or right click after the tooltip displays, this happens because the right click action may also be interpreted as a camera zoom by the underlying viewer.
Notice that this application will listen for messages from other applications, and when it receives a message asking to switch to a subject who is available in the current sample, this subject will be highlighted in both, the bar plot and the 3d viewers.
Selecting a sample
By default the application lads a random subset of subjects, notice that too large samples will not fit comfortably in the visualization nor in memory. In order to select a custom subsample go to the file menu and click on select sample (see Creating Samples ).
Loading a visualization
This applications loads scenarios created in the Subject Overview application repeatedly for each subject in the sample. Therefore the first step is creating the scenario in the subject overview application. Afterwards go to the file menu and click on load visualization. A scenario select dialog will appear, but you will notice it will display scenarios from the Subject Overview application. It is also possible to save and load full scenarios for the Sample Overview application as will be explained below.Double click on the desired scenario and click ok, you will see a progress bar at the bottom right corner while the scenario is loaded for each subject.
Notice that depending on the complexity of the scenario, the size of the sample, existing cache, and the characteristics of your machine; this process may take a while. It is also possible that the interface will freeze during this process. This is absolutely normal, and if it happens you shouldn’t do anything, just wait a while and it will recover.
Selecting Variables
You may change the nominal variable used for determining the rows of the 3d viewers and the colors in the bar plot; and the rational variable used for the length of the bars and the left to right order inside each row. To do this use the Facet Variable and Sort Variable combo boxes respectively. Notice that the first combo will only let you choose a nominal variable, while the last one will only allow you to select real variables.
Manipulating the camera
You can manipulate the camera in each 3d viewer independently by using the techniques explained in Navigating 3d views. However, notice that it is not possible to move images, or change window and level values. On the other hand, you can start all actions on top of image objects. This behaviour is intended to ease manipulating the camera in the small windows.
After moving the camera around in one subject it is possible to copy the new position to all existing viewers by going to the Camera combo box and selecting Copy from <subj>, where <subj> is the subject whose camera you manipulated last. It is also possible to reset the cameras back to the one specified in the visualization, by clicking on Reset from scenario in the mentioned context menu.
Scenarios
Saving scenarios for this application will allow you to restore the visualization, the selected variables, the sample and the camera positions. In order to do this go to the file menu and click on save scenario. You will be asked for a name and an optional description.
In order to load a scenario, go to the file menu and click on load scenario, in the dialog that opens double click on the desired scenario and click ok.